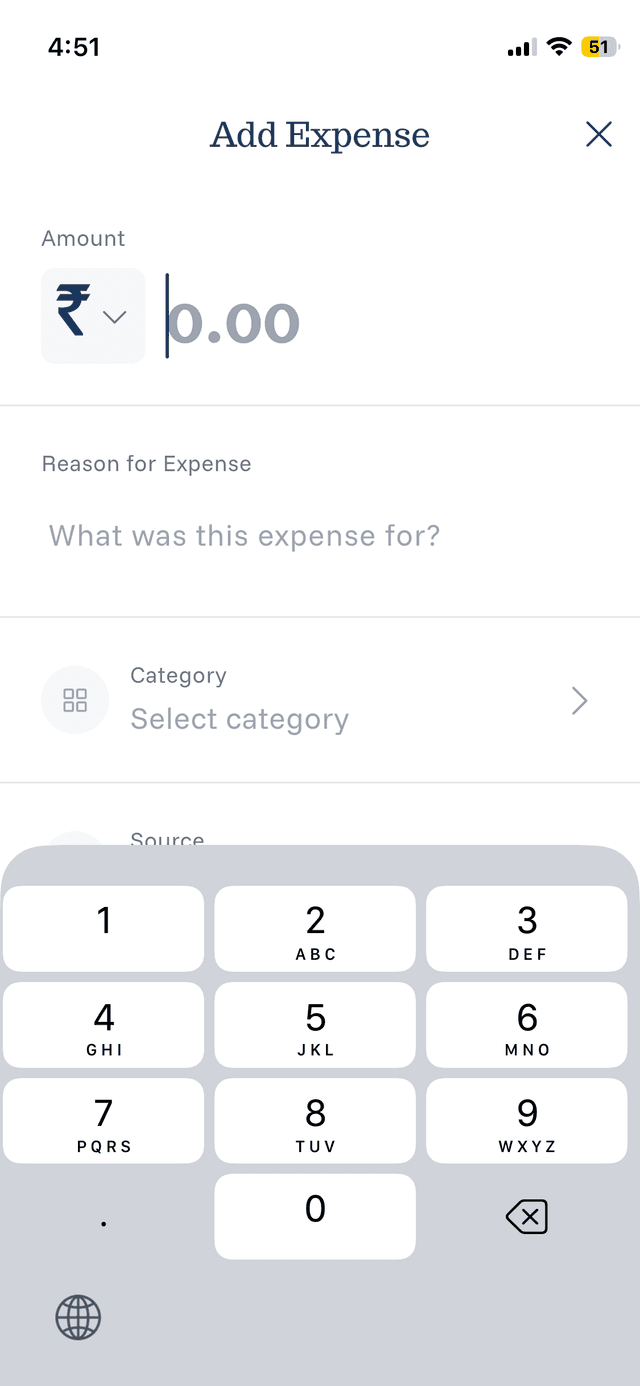
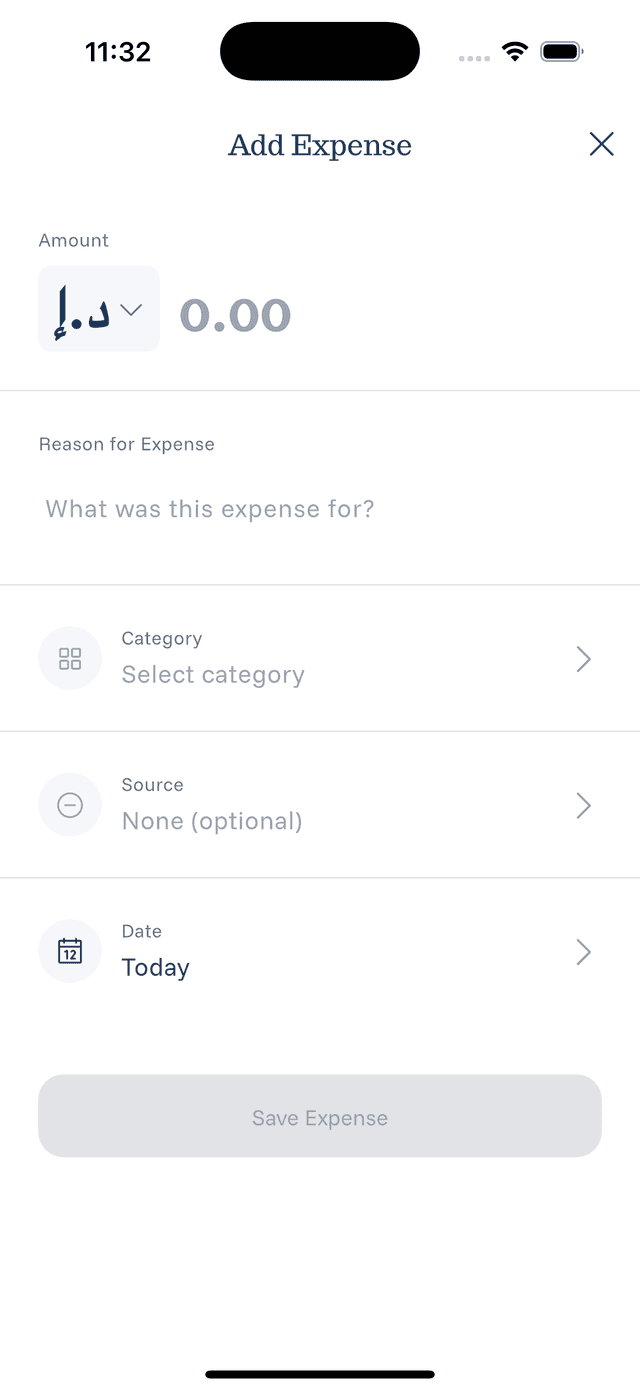
Adding an Expense Manually
Sometimes typing is easier than speaking. Here's how to add expenses manually.
Starting Manual Entry
- From the home screen, tap the recording options area
- Select Manual Entry or tap the keyboard icon
- The expense form will open
Filling Out the Form
Amount:
- Enter the expense amount
- Select the currency if different from default
Description:
- Add a brief description of the expense
- Example: "Lunch at Subway" or "Monthly gym membership"
Category:
- Tap to select from available categories
- Choose the most appropriate category for your expense
Source:
- Select which payment method you used
- This helps with tracking spending by card/account
Date:
- By default, today's date is selected
- Tap to change if you're logging a past expense
Saving the Expense
Once all fields are filled:
- Review the information
- Tap Save or Add Expense
- The expense appears in your list immediately